First Application - Hello World
-
New project
MS Visual Studio 2017
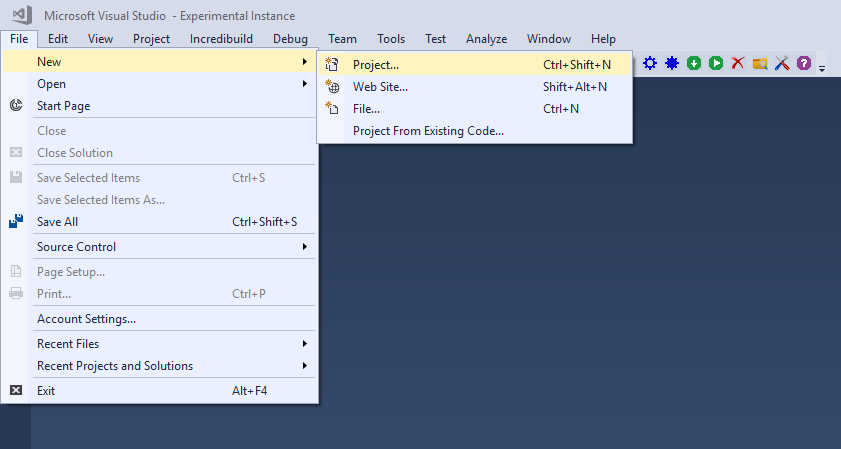
Choose File -> New -> Project... from the main menu of MS Visual Studio.

MS Visual Studio 2019
Choose File -> New -> Project... from the main menu of MS Visual Studio.
.png)
Dialog New Project will be showed.
-
LegoEV3 Project
MS Visual Studio 2017
Choose Installed -> Templates -> Visual C++ -> Lego -> Mindstorms EV3 -> LegoEV3 in dialog New Project.
Fill items Name and Location.
Item Location is the location of the HelloWorld project.
Write HelloWorld to item Name.
Click to the button OK.

New project HelloWorld will be generated.
MS Visual Studio 2019
Choose these parameters:
Language: C++
Platform: Lego Mindstorms
Project type: Cpp4Robots
Then select project Mindstorms EV3 and click the button Next.
.png)
Dialog "Configure your new project" will be showed.
Fill items Project name and Location.
Item Location is the location of the HelloWorld project.
Write HelloWorld to item Project name.
Then click to the button Create.
.png)
-
HelloWorld Project
You can see new HelloWorld project in Solution Explorer window.
File EV3_Main.cpp is automatically generated.

Paste the following source code into the file EV3_Main.cpp

-
Build HelloWorld Project
Button Build Lego EV3 Project on LegoEV3 Toolbar will build HelloWorld project.

You can see result of building process in output window.

-
Download Application into EV3 Brick
Make sure that EV3 Brick is connected(USB cable) and EV3 Brick is turned on.
Or you can use bluetooth connection. In this case make sure that bluetooth is enabled on your EV3 Brick.
Button Connect EV3 Brick on LegoEV3 Toolbar will make a connection with your EV3 Brick.

Button Download Application to EV3 Brick on LegoEV3 Toolbar will download application into your EV3 Brick.

-
Start Application
Button Start Application on LegoEV3 Toolbar will launche the application in your EV3 Brick.

